


Key Takeaways:
- Proper preparation and application are crucial for long-lasting black press-on nails.
- Using the right products and techniques can extend the wear time to two to three weeks.
- Regular maintenance and care can prevent lifting, peeling, and breakage.
Introduction
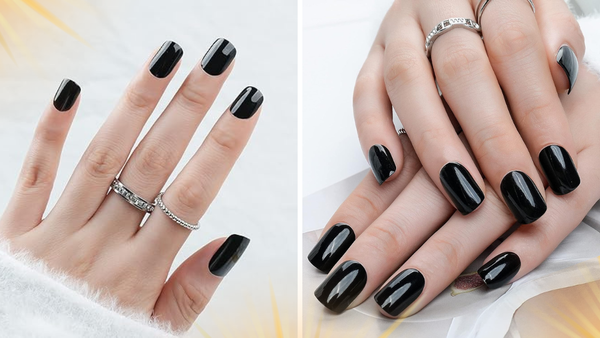
Black press-on nails are a chic and versatile option for anyone looking to achieve a salon-quality manicure at home. However, ensuring they last as long as possible requires a bit of know-how. This guide will walk you through the steps and tips to keep your black press-on nails looking fabulous for weeks.
Preparing Your Natural Nails
Preparing your natural nails properly before applying your black press-on nails is essential. Start by removing any old nail polish or residue using a gentle nail polish remover. This step ensures that your nails are clean and free from any oils that could interfere with the adhesive.
Next, trim and file your natural nails to your desired length and shape. Buff the surface of your nails lightly to create a rough texture, which helps the press-ons adhere better. Finally, push back your cuticles using a cuticle pusher to create a clean nail bed for the press-ons.
Choosing the Right Press-On Nails
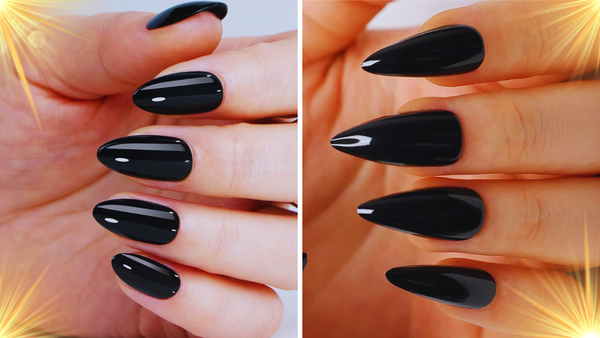
Selecting the right press-on nails is crucial for a long-lasting manicure. Look for high-quality black press-on nails in various shapes and lengths, such as square, coffin, or medium length. Ensure that the press-ons fit your natural nails perfectly, as a proper fit prevents lifting and peeling.
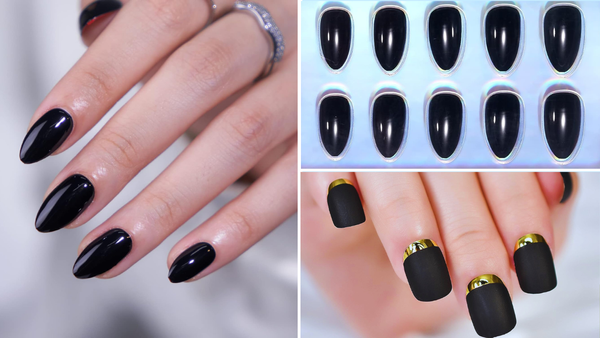
Consider the press-on material as well. Some press-ons are made from durable materials that mimic the look and feel of gel or acrylic nails. These options tend to last longer and provide a more natural appearance.
Using Nail Glue Effectively
Nail glue is a key component in making your black press-on nails last. Apply a small drop of nail glue to your natural and press-on nails. Spread the glue evenly to ensure full coverage. Press the press-on nail onto your natural nail and hold it for 10-15 seconds to allow the glue to set.
For added durability, consider using a double glue technique. Apply a thin layer of glue to your natural nail, let it dry, and then apply another layer before attaching the press-on. This method provides extra adhesion and helps the press-ons stay intact for longer.
Applying Pressure for a Secure Fit
Applying pressure during the nail application process is essential for a secure fit. After placing the press-on nail, press down firmly and evenly across the entire nail surface. This ensures that the adhesive bonds properly and prevents air bubbles from forming.
Use a nail tool or your fingers to apply pressure, focusing on the edges and corners of the press-on nail. Hold the pressure for a few seconds to ensure a strong bond. This step is crucial for preventing lifting and ensuring your press-ons stay in place.
Sealing with a Top Coat

A top coat is necessary for making your black press-on nails last longer. After applying the press-ons, seal them with a high-quality top coat. This adds an extra layer of protection and helps prevent chipping and peeling.
Choose a top coat specifically designed for press-on nails or gel nails. Apply a thin, even layer over the entire nail surface, including the edges. Allow the top coat to dry completely before using your hands to ensure maximum durability.
Avoiding Water and Moisture
Water and moisture can weaken the adhesive and cause your press-on nails to lift. To keep your black press-ons intact, avoid prolonged exposure to water, especially during the first 24 hours after application.
Wear gloves to protect your nails when washing your hands or doing household chores. Additionally, avoid soaking your hands in warm water for extended periods, as this can cause the adhesive to break down and the press-ons to peel.
Regular Maintenance and Care
Regular maintenance is essential for keeping your black press-on nails looking their best. Check your nails daily for any signs of lifting or peeling. If you notice any issues, apply a small amount of nail glue to the affected area and press down firmly to reattach the press-on.
Keep your nails clean and free from dirt and debris. Use a soft nail brush to clean the edges of the press-ons gently. Avoid using your nails as tools to open packages or perform other tasks that could cause them to break or lift.
Protecting Your Nails from Damage
Protecting your nails from damage is crucial for maintaining the longevity of your black press-ons. Be mindful of how you use your hands and avoid activities that could pressure your nails excessively.

If you engage in activities that require heavy hand use, such as typing or gardening, consider wearing gloves to protect your nails. Additionally, avoid using your nails to pry open objects or perform tasks that could cause them to chip or break.
Removing Gel Nails Properly
If you have gel nails or a gel manicure, it's important to remove them properly before applying black press-on nails. Soak your nails in warm water for 10-15 minutes to soften the gel. Use a gentle nail file to buff away the gel layer, being careful not to damage your natural nails.
Avoid peeling or picking at the gel, as this can cause your natural nails to become weak and brittle. Once the gel is removed, follow the proper steps to prepare your nails for the press-ons.
Choosing the Right Length and Shape
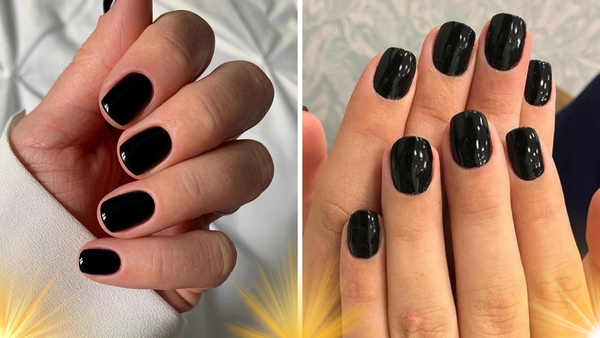
The length and shape of your black press-on nails can impact their durability. Choose a length and shape that suits your lifestyle and daily activities. Medium-length nails are a popular choice as they balance style and practicality.
Square and coffin shapes are also great options for black press-ons, as they offer a modern and edgy look. Ensure that the press-ons fit your natural nails comfortably and do not extend too far beyond the nail bed, which can increase the risk of lifting and breakage.
Using a Nail Primer
A nail primer can enhance the adhesion of your black press-on nails. Apply a thin layer of nail primer to your natural nails before applying the press-ons. The primer helps remove any remaining oils and creates a better surface for the adhesive.
Allow the primer to dry completely before proceeding with the nail application process. This extra step can significantly improve the longevity of your press-ons and prevent them from lifting prematurely.
Avoiding Harsh Chemicals
Harsh chemicals can weaken the adhesive and cause your black press-on nails to lift. Avoid using products that contain acetone, alcohol, or other strong solvents on your nails. These chemicals can break down the adhesive and cause the press-ons to peel.
Wear gloves to protect your nails when using cleaning products or other household chemicals. Also, avoid using nail polish removers containing acetone, as this can weaken the adhesive and cause your press-ons to lift.
Using a Nail Strengthener
A nail strengthener can help reinforce your natural nails and provide a better foundation for your black press-ons. Apply one regularly to keep your natural nails healthy and strong.
Choose a nail strengthener specifically designed for use with press-on nails. Apply a thin layer to your natural nails and allow it to dry completely before applying the press-ons. This extra step can help prevent your natural nails from becoming weak and brittle.
Avoiding Excessive Heat
Excessive heat can weaken the adhesive and cause your black press-on nails to lift. Avoid exposing your nails to high temperatures, such as hot water or direct sunlight, for extended periods.
When using heat-styling tools like hair dryers or curling irons, be mindful of how you handle your nails. Avoid placing your nails directly in the heat path to prevent the adhesive from breaking down.
Using a Nail Dehydrator
A nail dehydrator can help to remove any remaining oils and moisture from your natural nails, creating a better surface for the adhesive to bond to. Apply a thin layer of nail dehydrator to your natural nails before applying the press-ons.
Allow the dehydrator to dry completely before proceeding with the nail application process. This extra step can significantly improve the longevity of your press-ons and prevent them from lifting prematurely.
Avoiding Excessive Force
Excessive force can cause your black press-on nails to lift or break. Be mindful of how you use your hands and avoid activities that could pressure your nails excessively.
If you engage in activities that require heavy hand use, such as typing or gardening, consider wearing gloves to protect your nails. Additionally, avoid using your nails to pry open objects or perform tasks that could cause them to chip or break.
Using a Nail Buffer
A nail buffer can help to create a smooth surface for your black press-on nails to adhere to. Use a gentle nail buffer to lightly buff the surface of your natural nails. This step helps remove ridges or imperfections and creates a better surface for the adhesive to bond to.
Be careful not to over-buff your nails, as this can cause them to become weak and brittle. Use a light touch and focus on creating a smooth, even surface for the press-ons.
Avoiding Excessive Moisture
Excessive moisture can weaken the adhesive and cause your black press-on nails to lift. Avoid prolonged exposure to water, especially during the first 24 hours after application.
Wear gloves to protect your nails when washing your hands or doing household chores. Additionally, avoid soaking your hands in warm water for extended periods, as this can cause the adhesive to break down and the press-ons to peel.
Using a Nail Hardener
A nail hardener can help reinforce your natural nails and provide a better foundation for your black press-ons. Apply one regularly to keep your natural nails healthy and strong.
Choose a nail hardener specifically designed for use with press-on nails. Apply a thin layer to your natural nails and allow it to dry completely before applying the press-ons. This extra step can help prevent your natural nails from becoming weak and brittle.
Frequently Asked Questions
Can I use regular nail polish remover on press-on nails?
It's best to avoid nail polish removers containing acetone, which can weaken the adhesive. Use a non-acetone remover instead.
How can I protect my press-on nails during daily activities?
Wearing gloves while doing household chores and avoiding using your nails as tools can help protect your press-on nails from damage.
How can I make my false nails last longer?
To make your false nails last longer, ensure proper preparation by cleaning and buffing your natural nails, applying high-quality nail glue, using a top coat for added protection, and avoiding prolonged exposure to water and harsh chemicals. Regular maintenance and wearing gloves during chores also help maintain their durability.
How do I ensure I am using high-quality black press-on nails?
To ensure you are using high-quality black press-on nails, choose brands known for durable materials that mimic gel or acrylic nails, ensure the nails fit your natural nails well, and check for positive reviews that highlight longevity and a natural appearance.
Are coffin-shaped black press-on nails a good choice for durability?
Yes, coffin-shaped black press-on nails are a good choice for durability. Their broader tip provides more stability and reduces the likelihood of chipping or breaking, making them a stylish yet practical option.
Why is it important to apply pressure when attaching black press-on nails?
Applying pressure when attaching black press-on nails is important because it ensures a secure bond between the nail and adhesive, prevents air bubbles and reduces the risk of lifting or peeling.
How can I make my fake nails last longer and look more natural when using black fake nails?
To make your black fake nails last longer and look more natural, start by properly preparing your natural nails, use high-quality fake nails that fit well, and apply strong nail glue. Additionally, apply pressure for a secure fit and finish with a top coat to enhance durability and appearance.
How can I ensure the glue on my black press-on nails provides a strong, long-lasting hold?
To ensure the glue on your black press-on nails provides a strong, long-lasting hold, apply a small drop of glue to both your natural and press-on nails, spread the glue evenly, and press down firmly for 10-15 seconds. Using a double glue technique—applying a layer, letting it dry, then applying another layer before attaching the press-on—can also enhance adhesion.
How long do press-on nails typically last, and how can I extend the wear time of my black press-on nails?
Press-on nails typically last about one to two weeks, but with proper preparation, application, and maintenance, black press-on nails can last up to three weeks. To extend their wear time, ensure your natural nails are clean and oil-free, use high-quality adhesive, and avoid prolonged exposure to water and harsh chemicals.
Are black press-on nails in a square shape more durable than other shapes?
Yes, black press-on nails in a square shape are often more durable because the straight edges provide added stability and are less prone to snagging or breaking than more tapered shapes.
Final Thoughts
Achieving long-lasting black press-on nails requires attention to detail and proper care. Following the steps outlined in this guide, you can enjoy a salon-quality manicure at home for up to three weeks. Regular maintenance, appropriate product selection, and mindful hand usage are key to keeping your press-ons looking fresh and fabulous.