


Key Takeaways:
- Learn the basics of using a nail pen for intricate nail art designs.
- Discover tips and tricks for maintaining the perfect nail pen tip and polish application.
- Understand the importance of a top coat to seal and protect nail art creations.
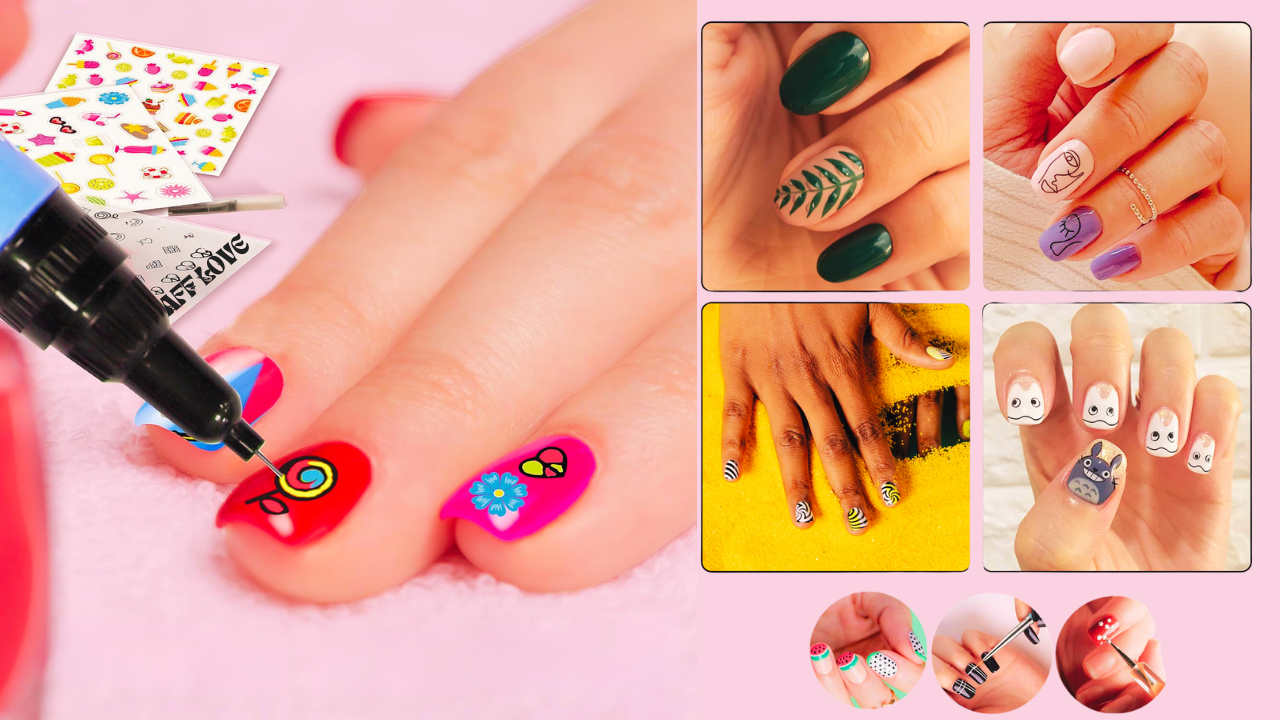
Nail art has transformed how we think about manicures, turning nails into tiny canvases for personal expression. With the rise of nail art pens, intricate designs that once seemed exclusive to professional nail salons are now within reach for DIY enthusiasts. If you're wondering how to use a nail pen, this comprehensive guide will walk you through the process, from preparation to the finishing touches.
Preparing Your Nails for Artistry
Before you dive into creating stripes, polka dots, or other intricate designs, it's essential to prepare your nails properly. Start by cleaning your nails with nail polish remover to eliminate any skin oil or residue. Push back your cuticles gently and trim any hangnails to create a clean workspace. Apply a thin layer of base coat to protect your nails and provide a smooth surface for your nail art. Allow the base coat to dry completely before proceeding.
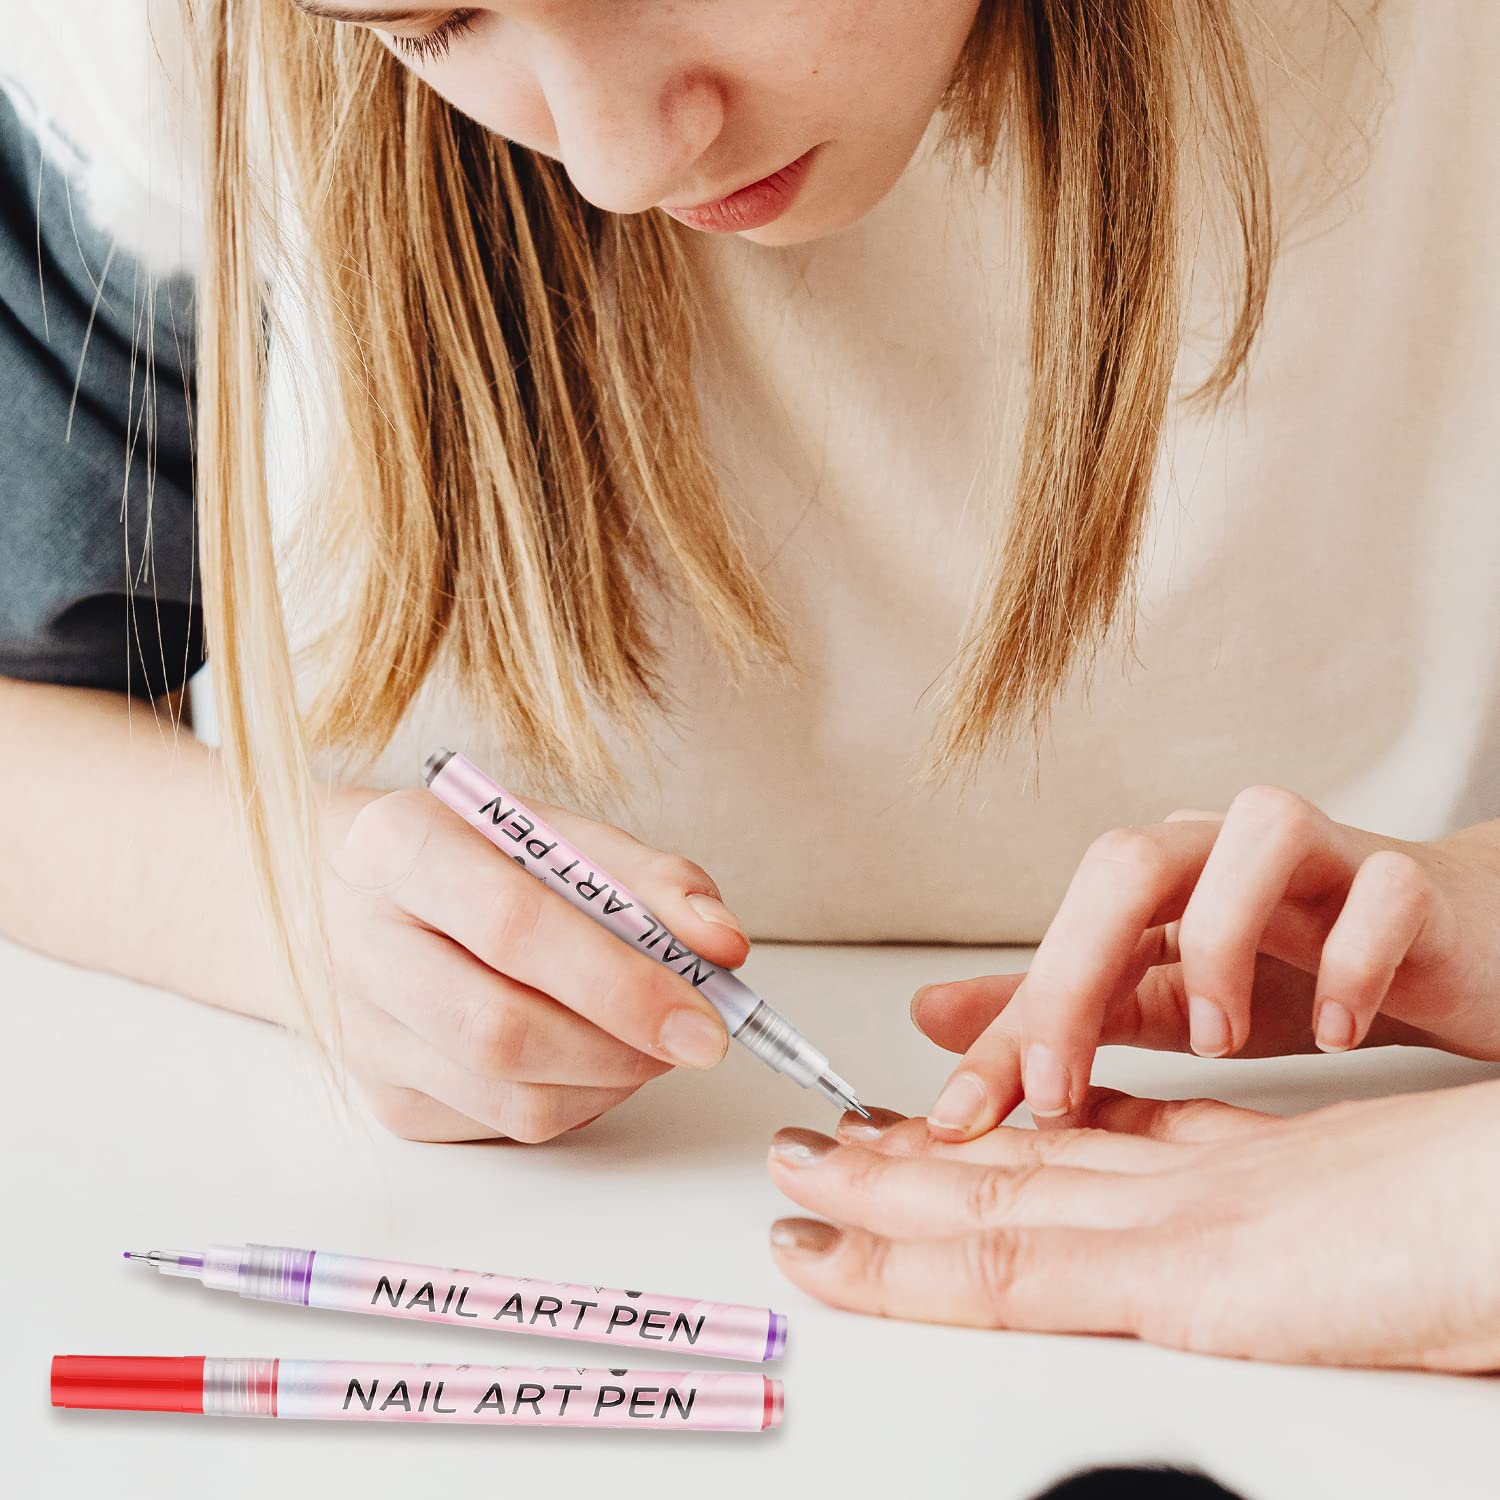
Choosing and Handling Your Nail Pen
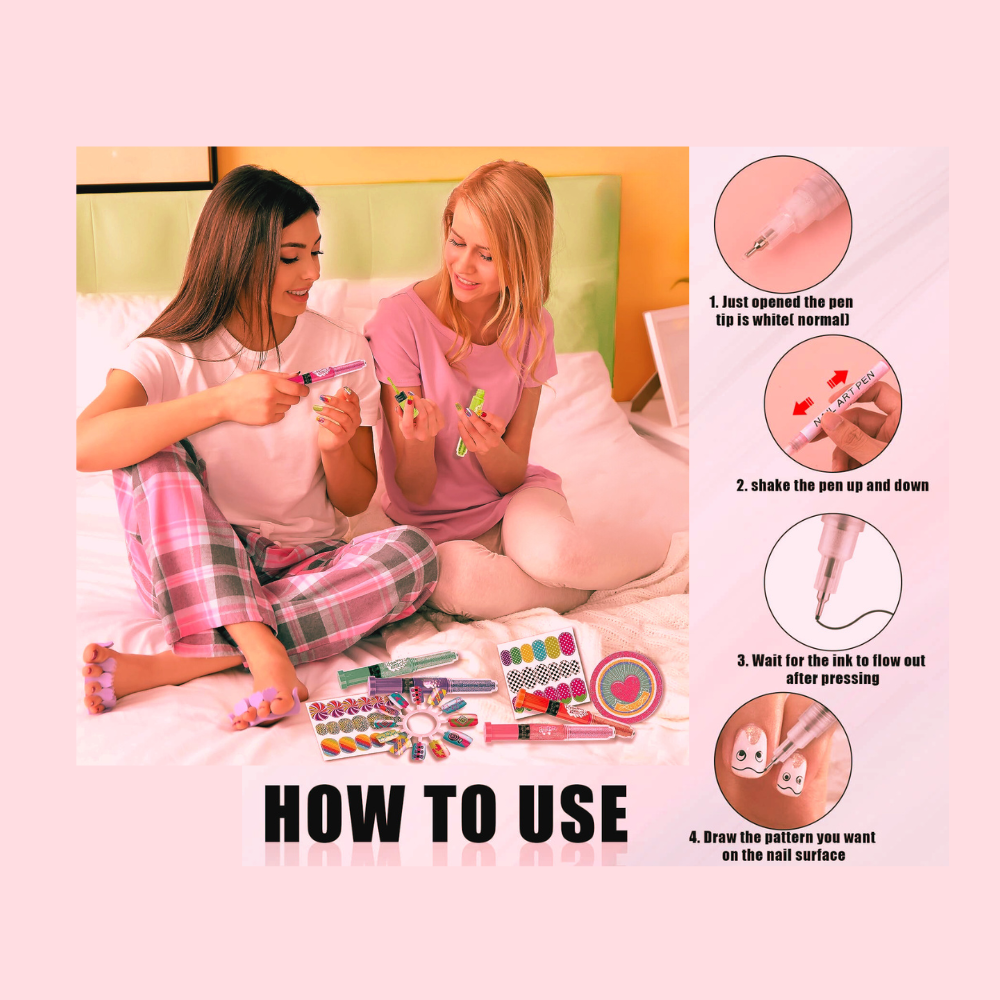
Selecting the right nail pen is crucial for achieving the desired effect. Look for pens with a concentration of titanium dioxide for opaque colors, and ensure the pen is held in an upright position to keep the flow consistent. Shake the pen well before use to mix the color and prevent air bubbles. When you're ready to start, practice on a piece of paper to get a feel for the pen tip's control and the pressure needed to create different line thicknesses.
Laying the Foundation with Base Colors
Apply two coats of your chosen nail polish as the foundation for your nail art. Wait for the first coat to dry completely before adding the second to avoid smudging. This will serve as the backdrop for your nail pen artistry. If you're using other colors for your design, make sure they are also dry before using the nail pen to prevent the colors from bleeding into each other.
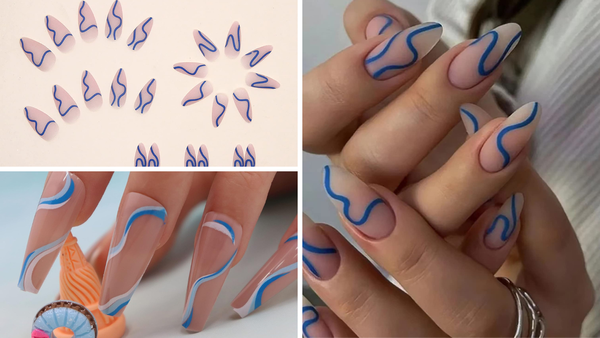
Creating Stripes and Lines with Precision
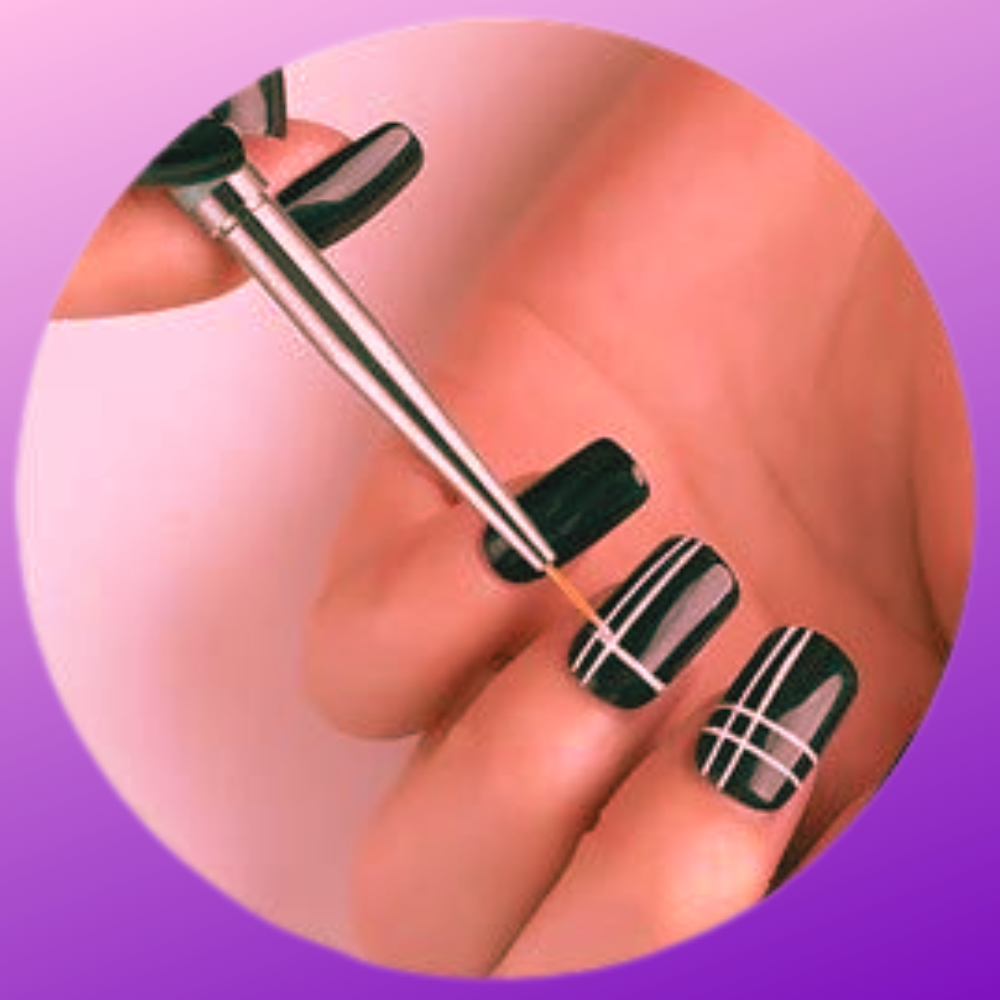
To create stripes, press the nail pen tip gently against the nail and draw a line from the base to the tip. Keep your non-dominant hand steady. For thinner stripes, use less pressure, and for thicker ones, apply more. If you make a mistake, quickly wipe it off with a damp cotton swab before it dries. Repeat the process to add as many stripes as you like, using the same or other colors.
Dotting Techniques for Fun and Flair
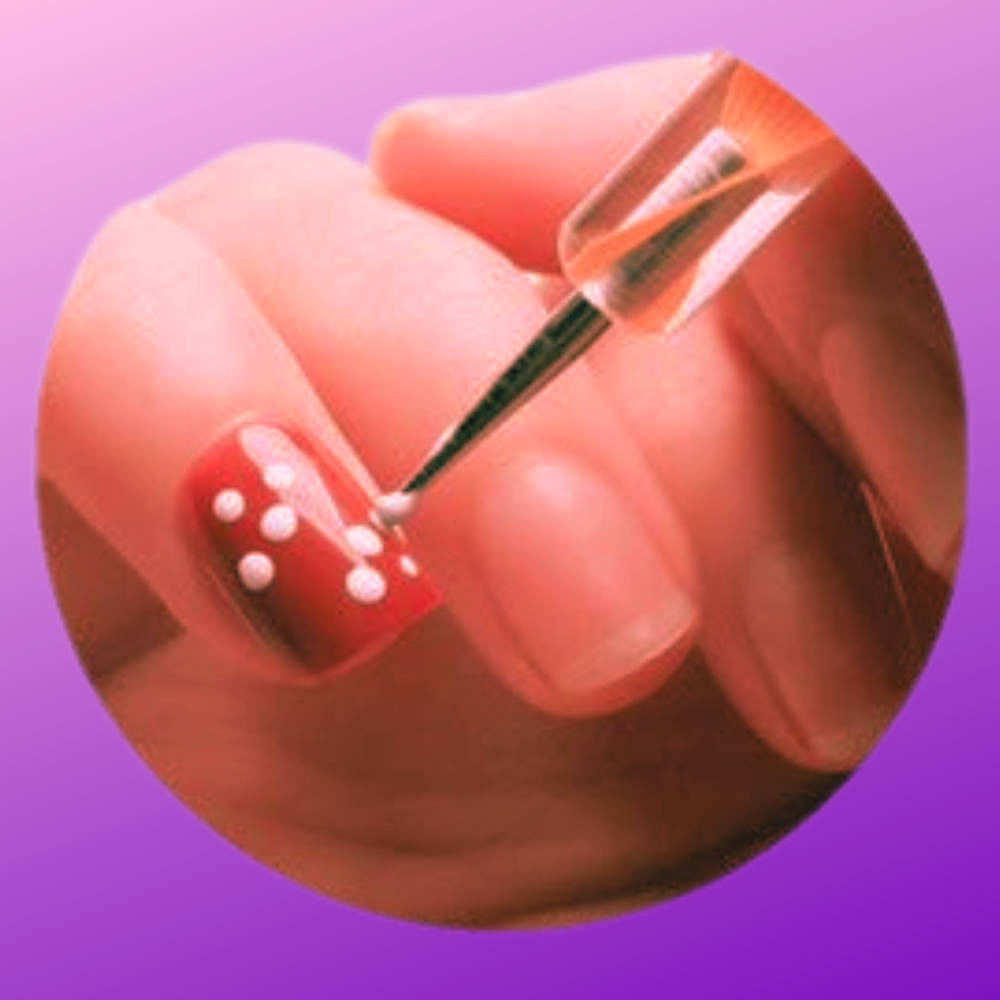
Polka dots are a fun and easy way to add personality to your nails. To create dots, simply press the tip of the nail pen onto the nail and lift it straight up. The size of the dot will depend on how long you leave the pen in contact with the nail. For smaller dots, touch the nail briefly; for larger dots, hold the pen down for a moment longer. Experiment with different sizes and colors to create a playful pattern.
Exploring Nail Art Pen Color Mixing Techniques
Mixing colors with nail art pens can transform a simple manicure into a canvas of creativity. To begin, select pens with complementary colors and ensure they are primed for use. Gently shake the pens to mix the internal paint, holding them in an upright position to avoid air bubbles. Start by applying a thin layer of base color and let it dry completely. Then, take your second color and, on a piece of paper, press the tip to release some paint. Dip your primary pen tip into the secondary color to create a unique blend on your nails. This easy way to mix colors can lead to stunning gradients and personalized hues that will garner compliments.
Creating custom colors isn't just fun; it's a way to express your individual style. For instance, mix a drop of titanium dioxide-based white with other colors to soften their intensity or add a touch of black to deepen them. Remember to clean the pen tip with nail polish remover between colors to maintain clarity. Experiment with different ratios to find the perfect shade for your design. Whether you're aiming for the soft pastels of spring or the rich tones of autumn, mastering color mixing with nail art pens will elevate your nail art ideas to new heights.
Nail Art Pen Techniques for Non-Dominant Hand Mastery
Achieving intricate designs with a nail art pen using your non-dominant hand can be challenging, but with the right techniques, it's entirely possible. Start by securing your dominant hand on a flat surface to minimize shaking. Use a striper brush or the nail pen to apply a base coat in a thin, even layer. Allow it to dry completely before proceeding. When you're ready to create stripes or shapes, position the pen at the angle that gives you the most control and draw slowly. Practice simple lines and dots before moving on to more complex patterns. It's also helpful to support your non-dominant hand by resting it against something stable, like the edge of a table.
For those intricate designs that require steadiness and precision, consider using tools like stencils or tape to guide your non-dominant hand. Apply the stencil securely to the dry base coat, and then use the nail art pen to fill in the design. Once you're satisfied, carefully remove the stencil before the polish dries to avoid smudging. With patience and practice, you'll find that creating nail art with your non-dominant hand becomes easier. Don't be discouraged by initial mistakes; even professional nail salon artists have to start somewhere. Keep a nail polish remover handy to correct any errors, and remember, every attempt is a step toward nail art pen mastery.
Crafting French Tips with Ease
French tips are a classic look that can be easily achieved with a nail pen. Paint the tip of your nail with the pen, following the natural curve of your nail. If you have a steady hand, you can freehand this, or you can use a striper brush or tape as a guide to ensure a crisp line. Apply a thin layer of polish with the pen and allow it to dry before adding a second layer if needed.
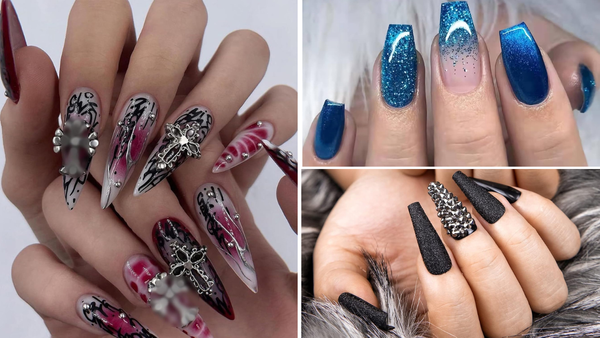
Intricate Designs for the Creative Spirit
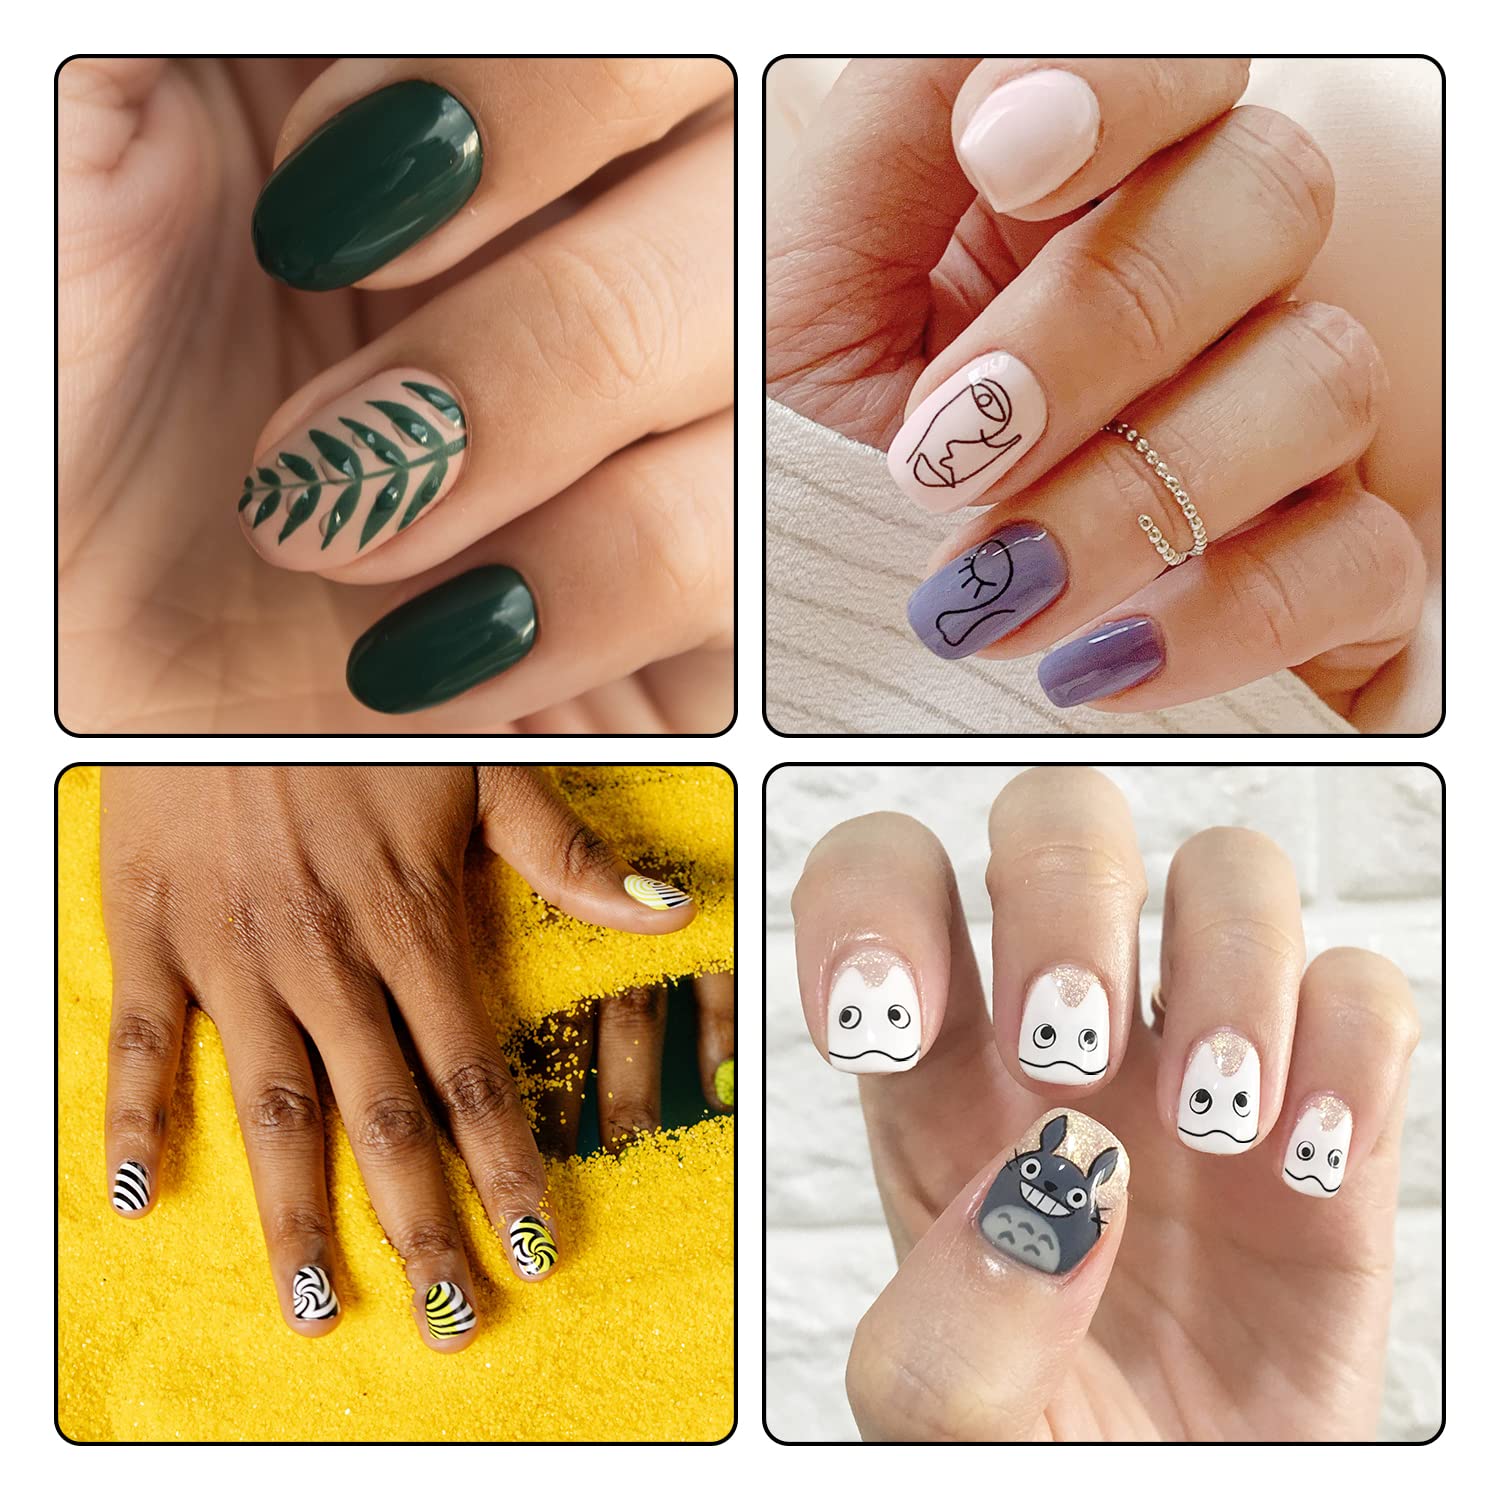
For those who want to take their nail art to the next level, intricate designs are where nail art pens truly shine. Draw shapes, patterns, or even cute characters on your nails. If you're new to detailed work, start with simple designs and gradually work to more complex ones. Remember, the key is patience and practice. Don't be discouraged by mistakes; they're part of the learning process.
Sealing Your Masterpiece with a Top Coat
Once your nail art is complete and dry, it's crucial to seal it with a clear top coat. This will protect your design from chipping and wearing, and it will also give your nails a glossy finish that compliments your artwork. Apply the top coat in a thin layer, being careful not to smudge your design. Allow the top coat to dry completely before using your hands.
Troubleshooting Common Nail Pen Issues
If your nail pen isn't working as expected, there are a few things you can try. Ensure the pen is stored in an upright position when not in use to prevent the tip from drying out. If the tip becomes clogged, you can try soaking it in warm water or using a pin to clear any blockages. Always clean the tip after use to extend the life of your nail pen.
Nail Pen Maintenance for Longevity
To keep your nail pen in top condition, store it properly and clean it regularly. After each use, wipe the tip with a tissue to remove excess polish. If the pen seems dry, shake it well and press the tip on a piece of paper to get the ink flowing again. With proper care, your nail pen can be a long-lasting tool in your nail art arsenal.
Summary
Using a nail pen is an easy way to add intricate designs and personal flair to your manicure. By preparing your nails, choosing the right pen, and practicing your technique, you can create stunning nail art at home. Remember to seal your designs with a top coat to protect and enhance your artwork. With a little patience and creativity, the possibilities are endless.
FAQ Section
How do you prevent air bubbles in your nail art?
To prevent air bubbles, make sure to shake your nail pen well before use and apply polish in thin layers. Avoid shaking the bottle vigorously right before application, as this can introduce air bubbles. If you get a bubble, gently pop it with a pin before the polish dries.
Can you use a nail pen on top of any nail polish?
Yes, you can use a nail pen on top of any nail polish as long as the polish is completely dry. If the base polish isn't dry, the pen may smudge it, or the colors may mix.
How do you fix mistakes made with a nail pen?
If you make a mistake with a nail pen, quickly wipe it off with a damp cotton swab or a small brush dipped in nail polish remover before it dries. If the mistake has dried, you can use a fine-tipped brush dipped in polish remover to carefully remove the error.