


Key Takeaways:
- Understand the Tools Needed: Knowing the right tools, such as the fine-grit nail file and nail clippers, is crucial for achieving the perfect almond nail shape.
- Filing Technique Matters: Master the filing motion and angle to ensure your almond nails have a smooth, even shape without sharp corners.
- Maintenance is Key: Regular upkeep using cuticle oil and nail polish can help maintain the integrity and appearance of your almond-shaped nails.
Introduction to Almond Shaped Nails
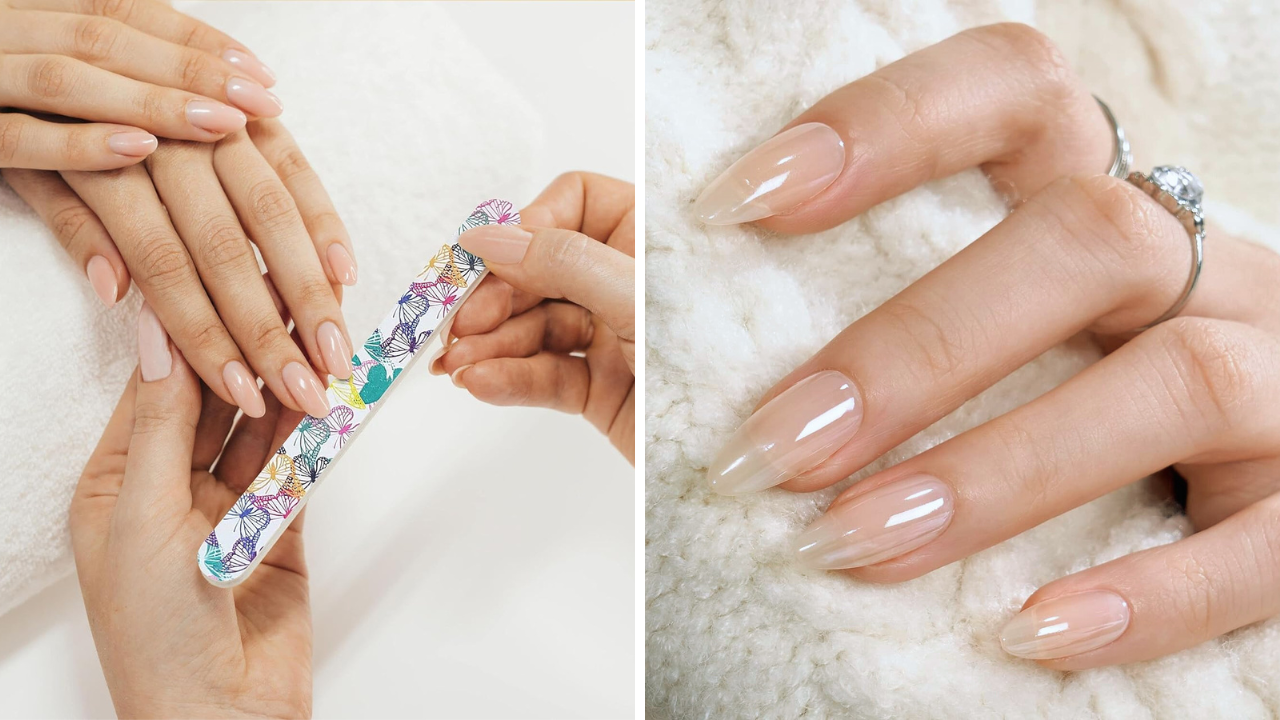
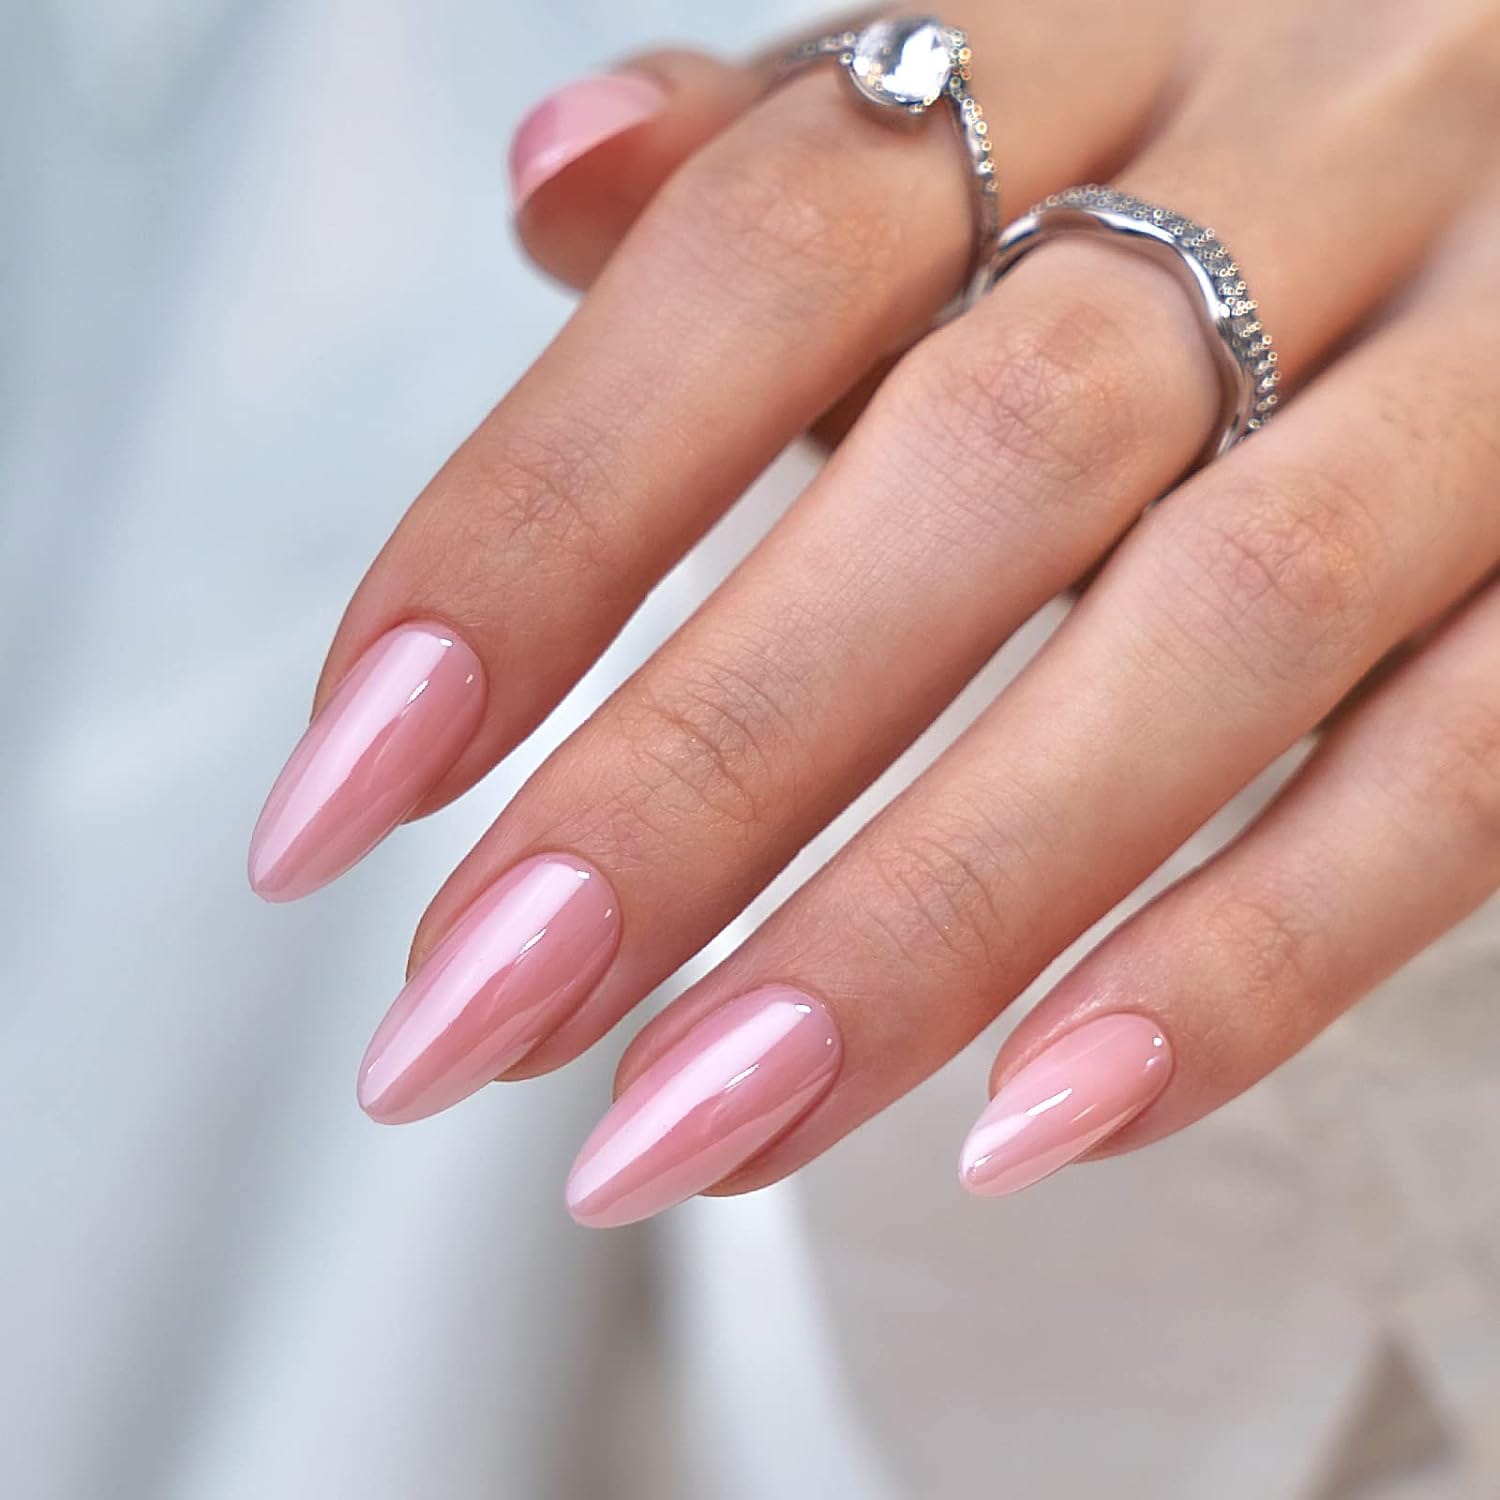
Almond-shaped nails are a popular choice for those seeking a sophisticated and slightly edgy look. Mimicking the shape of an actual almond, these nails are characterized by a tapered tip and a wide base, creating a stunning aesthetic. Whether you're preparing for a special event or want a chic update to your look, knowing how to file acrylic nails into an almond shape is an essential skill.
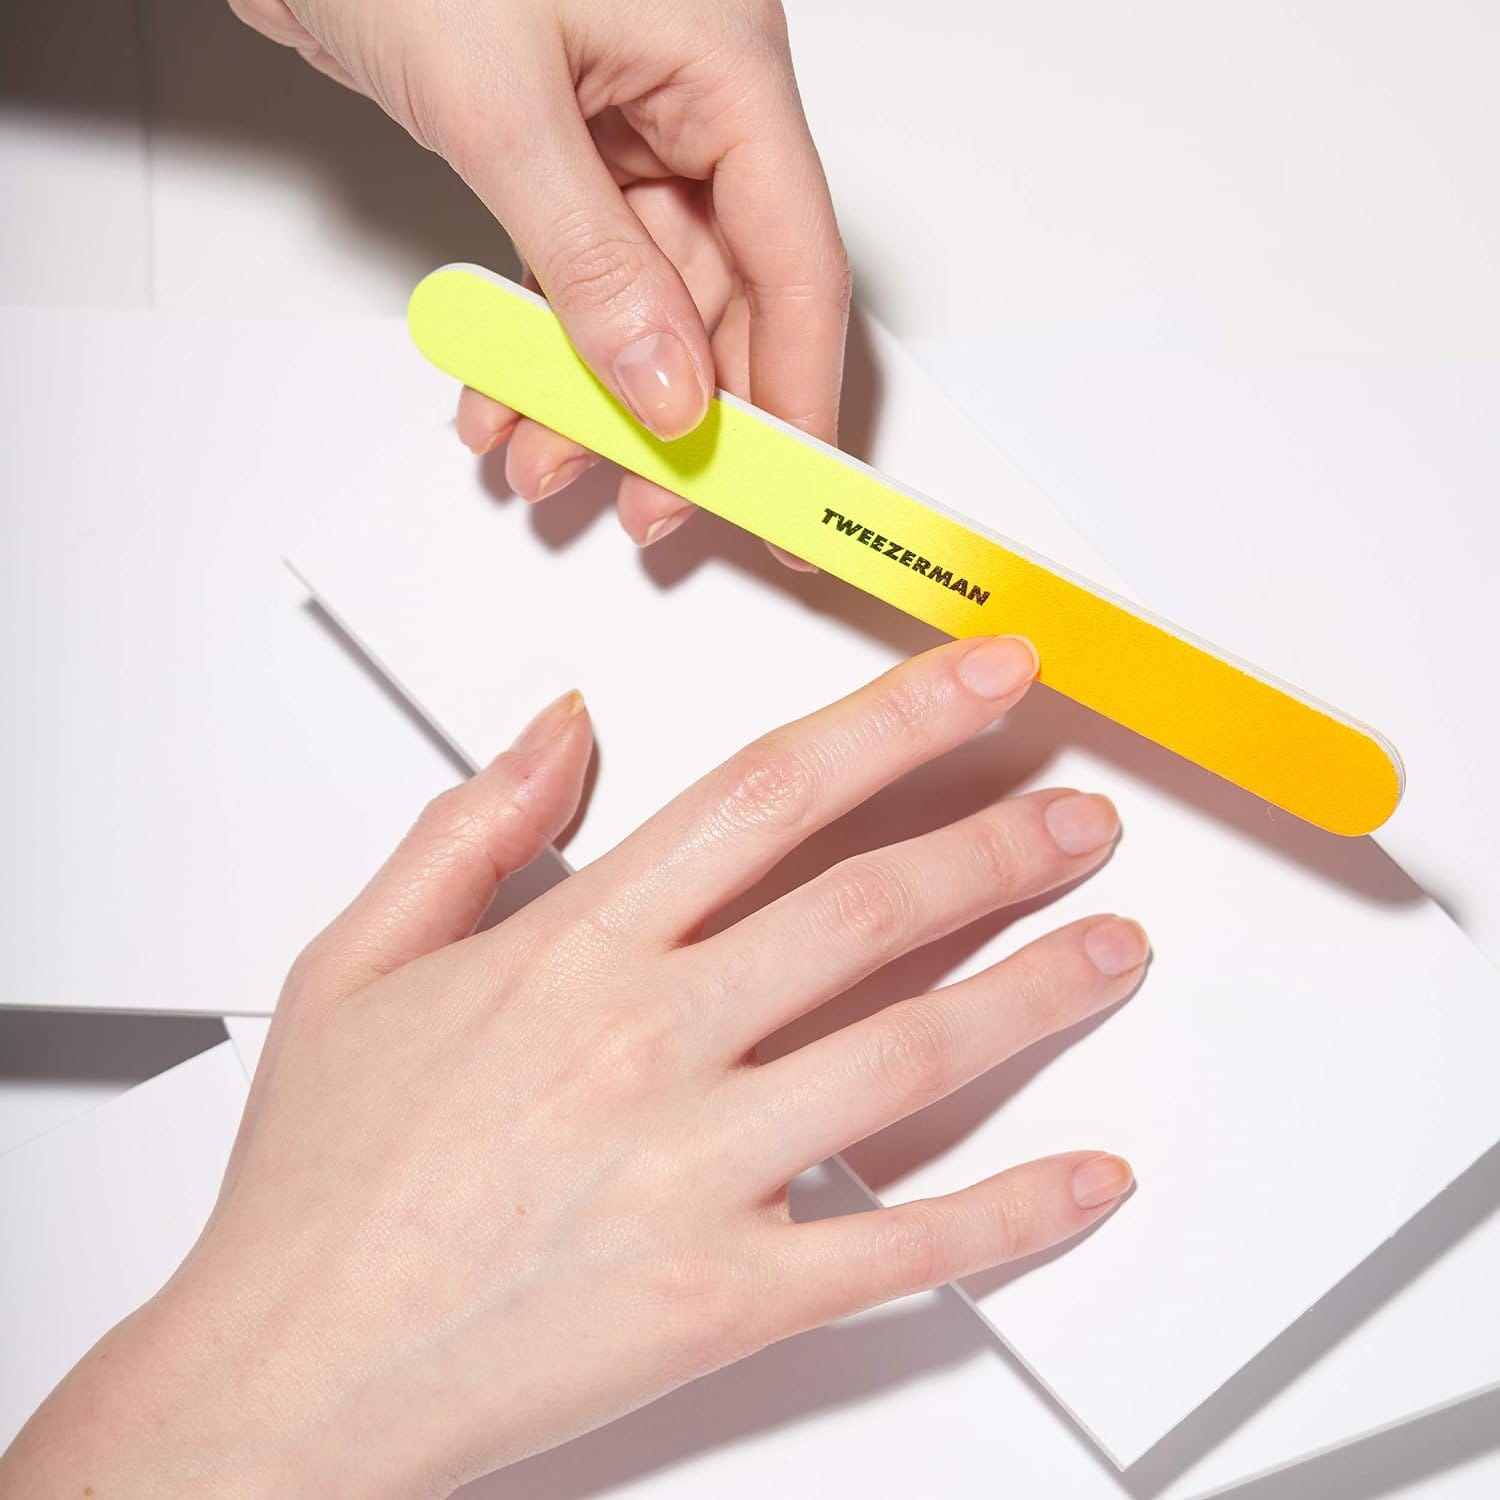
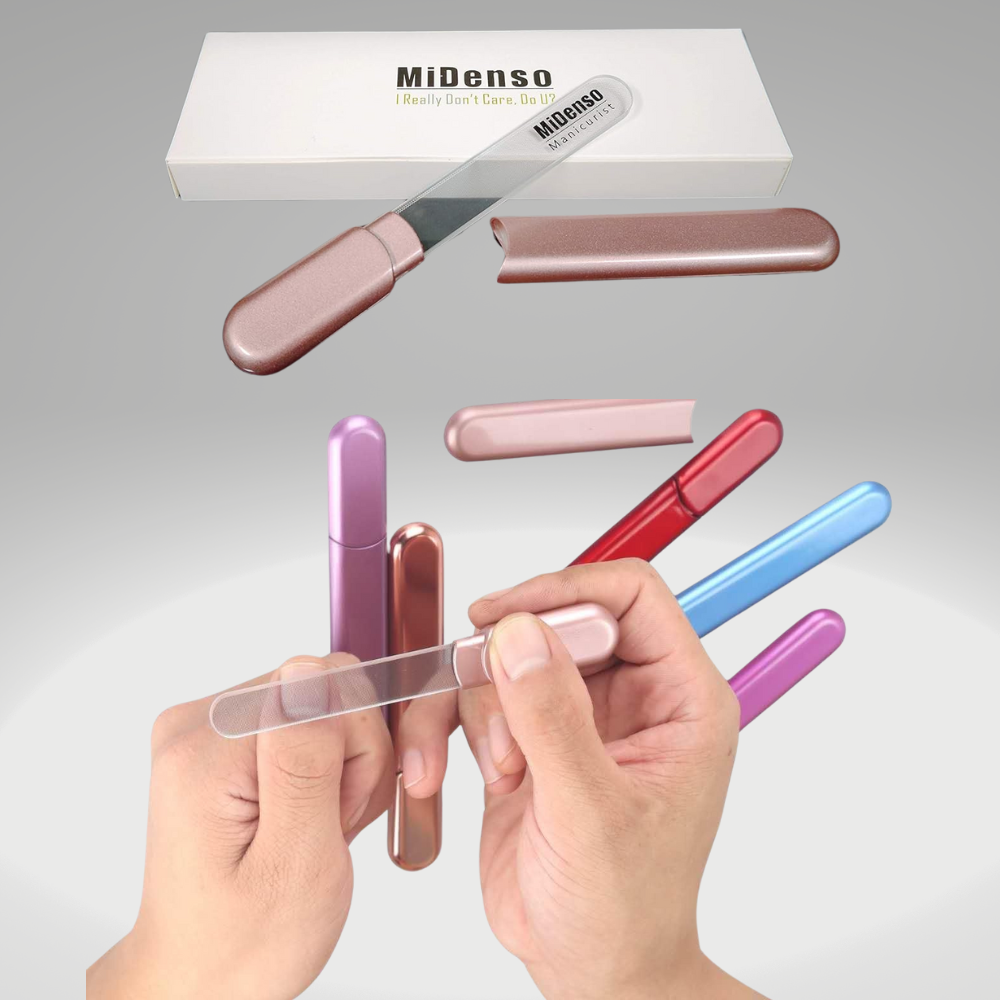
Essential Tools for Filing Almond Nails
Before you start shaping your acrylic nails, it's important to gather the right tools. A fine-grit nail file is essential for smoothing the surface and edges without causing damage. Nail clippers can help trim the nails to the desired length before you begin shaping. Additionally, having a cuticle pusher and nail polish remover on hand will ensure your nails are clean and prepped.
Preparing Your Nails
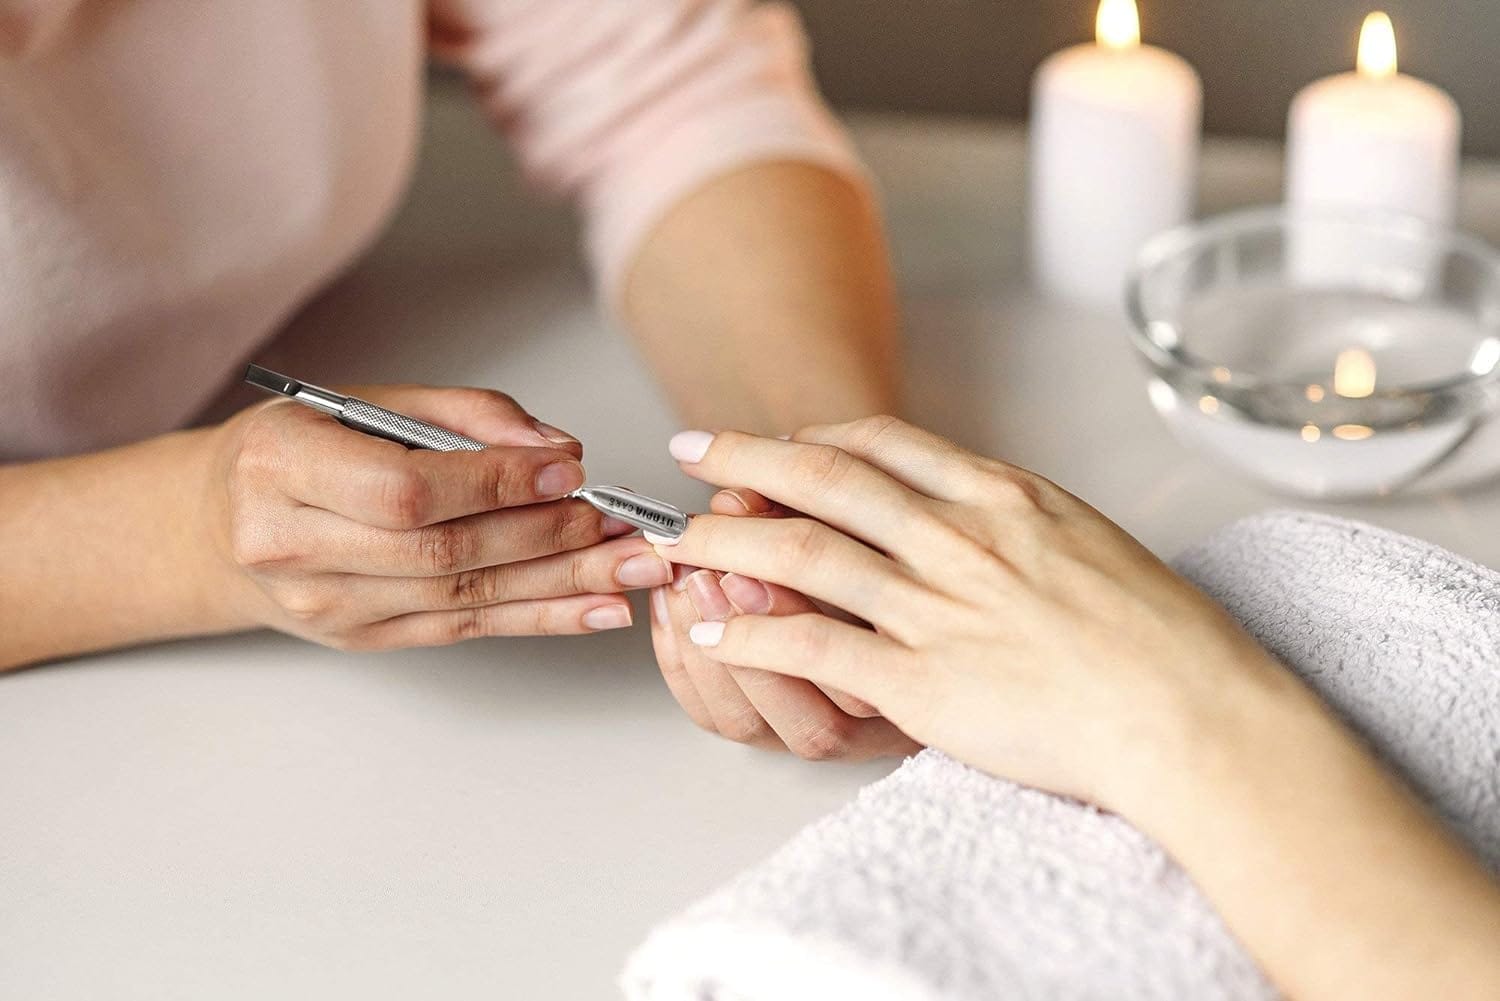
Start by removing any old nail polish with a nail polish remover. This will give you a clean slate to work on. Push back your cuticles gently with a cuticle pusher to expose the full nail bed, which is crucial for shaping. Trim your nails to a manageable length using nail clippers, keeping in mind that you can always file down more if needed.
Initial Shaping Technique
Begin shaping your nails by filing from the outer edge toward the center point of the nail in one direction. This technique helps prevent the nails from splitting and ensures a smooth, even shape. The goal is to create a slightly rounded tip that resembles the top of an almond.
Refining the Almond Shape

Once you have the basic shape, use the same filing motion to fine-tune the almond shape. Focus on creating a symmetrical appearance, ensuring the tapering on both sides of each nail is even. Avoid back-and-forth filing as it can weaken the acrylic and lead to rough edges.
Advanced Techniques for Filing Almond Nails
When learning how to file acrylic nail almonds, mastering advanced techniques can elevate your nail game significantly. Start by securing the nail at the desired length using nail clippers, ensuring not to clip too much as you want to maintain enough surface to shape into that elegant almond. Once clipped, use a fine grit nail file to define the almond shape. The key is to file in one direction from the side towards the center point of the nail tip. This method helps prevent any rough edges and maintains the integrity of the acrylic, preventing unwanted splits or cracks.
As you refine the almond shape, focus on creating a smooth, curved edge that mirrors the natural curvature of the cuticle. This symmetry is crucial for achieving the perfect almond nail shape. If you're working with particularly thick acrylics or transitioning from shapes like square nails or round nails to almonds, you might need to alternate between a coarse nail file and a fine grit file. The coarse file will help remove excess material quickly, setting the stage for fine-tuning with the finer file. Remember, the goal is to even the shape without creating sharp corners, maintaining a consistent filing motion.
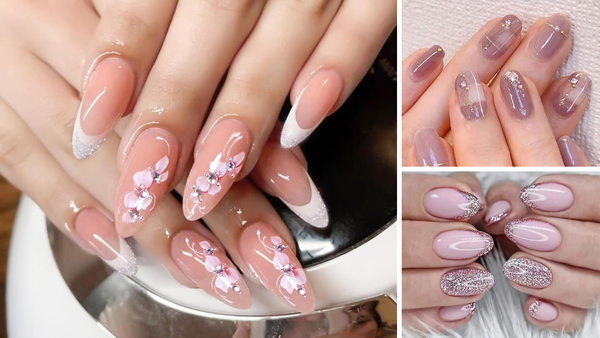
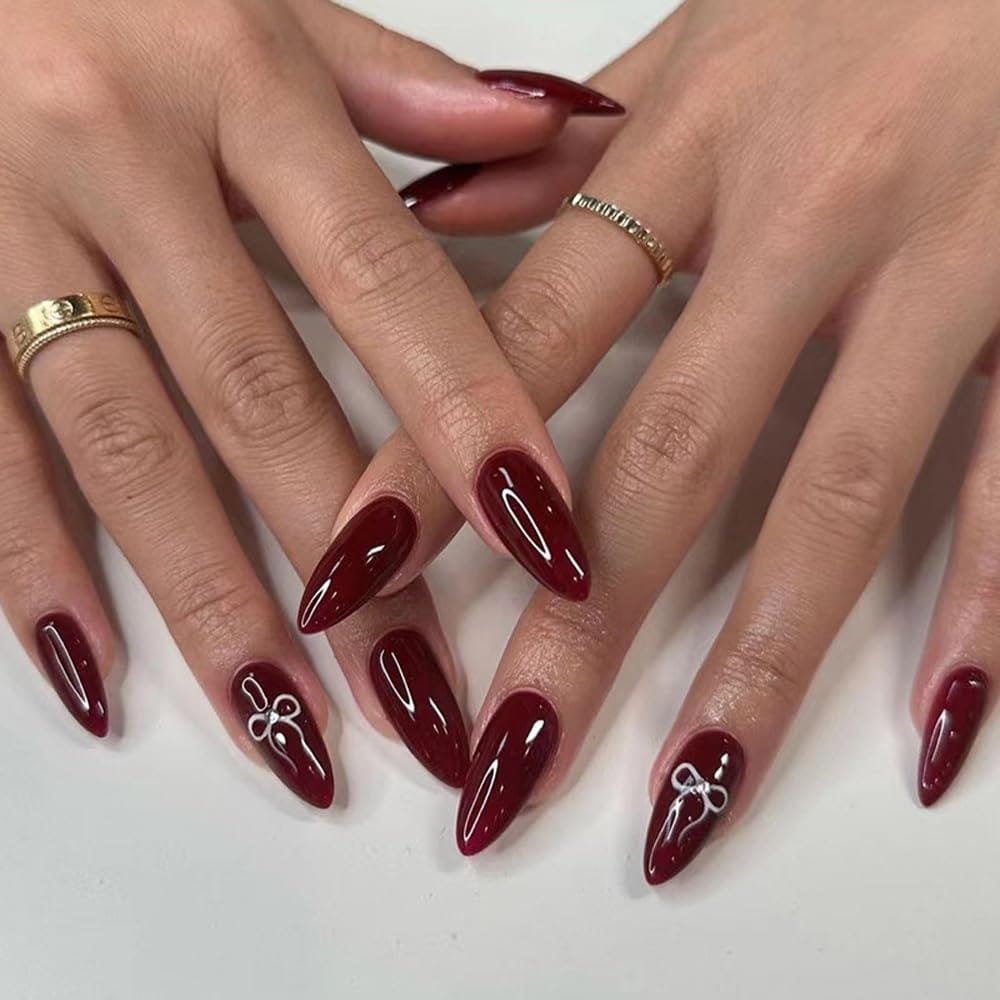
Trends in Almond Nail Colors and Textures
When considering how to file acrylic nails, nail polish can dramatically enhance the final look. Recent trends have shifted towards bold, matte finishes and textured polishes that add a unique touch to the almond nail shape. For instance, applying a suede matte polish after shaping your almond nails can transform the aesthetic from classic to contemporary. This style not only complements the curved edges of almond nails but also makes them stand out as a fashion statement. Experimenting with these textures allows for a personalized touch that reflects individual style while maintaining the elegant silhouette of almond nails.
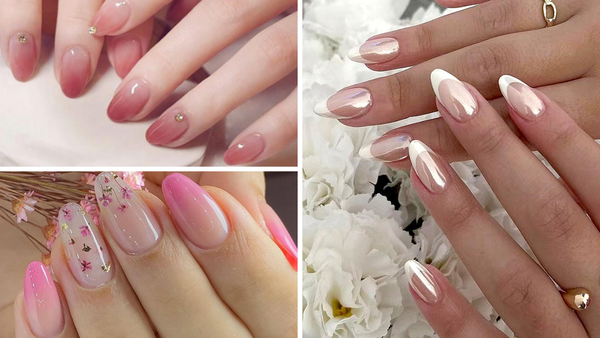
Moreover, integrating ombre and gradient effects with almond-shaped nails is gaining popularity. Using a fine-grit nail file to achieve the perfect shape, these gradient designs can be applied seamlessly, creating a stunning visual transition along the length of the nail. This technique involves blending two or more polish colors from the cuticle to the tip or across the nail, enhancing the almond shape's natural elegance. Whether opting for subtle pastels or vibrant neons, these effects make the almond nails a canvas for artistic expression, pushing the boundaries of traditional nail art.
Customizing Almond Nail Length: From Short to Long
When considering how to file acrylic nails, the length of the nail can dramatically alter the overall look. For those preferring short almond nails, start filing from the side towards the center using a fine grit nail file, maintaining a slight angle to preserve the nail's strength. This technique helps achieve a subtle almond shape without making the nails appear too sharp or elongated, which is ideal for maintaining a professional yet stylish appearance. On the other hand, long almond nails require more careful shaping to ensure the tips are not too fragile.
Expanding the almond nail to a longer length involves a careful balancing act between maintaining the iconic curved edge and ensuring the structural integrity of the acrylic. Begin by marking a thin line in the center of the nail as a guide to achieve symmetrical results. Use a coarse nail file for the initial lengthening, then switch to a finer grit to smooth out the edges and perfect the shape. This method not only enhances the elegance of long almond nails but also minimizes the risk of breakage, allowing for a glamorous yet durable finish.
Mastering the Art of Almond Nail Filing: Techniques and Tips
When learning how to file acrylic nails almond, it's crucial to understand the importance of the filing motion and the selection of the right nail file. Start by using a coarse nail file to establish the basic almond shape, focusing on filing the nails at a slight angle towards the center point of the tip. This method helps in creating the tapered look characteristic of almond nails. Ensure that the filing motion is consistent and gentle to avoid creating any sharp corners or rough edges that could compromise the overall smoothness and symmetry of the almond shape.
Once the basic shape is achieved, switch to a fine-grit nail file to fine-tune the shape and smooth out any imperfections. This step is essential for achieving the perfect almond nail shape, allowing for more precise shaping and a smoother finish. Pay special attention to the free edge and the apex of the nail, ensuring they are perfectly aligned and free from any irregularities. This meticulous approach not only enhances the aesthetic appeal of the almond nails but also ensures their durability and resistance to breakage.
The Evolution of Almond Nail Shapes: From Classic to Contemporary
Almond nails have undergone a fascinating evolution, transitioning from classic simplicity to embodying modern artistic expressions. Initially favored for their natural and subtle appeal, almond nails have become a canvas for creativity. The shape itself, characterized by a tapered tip and a wide base, mimics the actual almond, providing an elegant silhouette that elongates the fingers. This shape is versatile, making it suitable for short and long nails, and adapts well to various nail art designs, from minimalistic styles to intricate patterns. The adaptability of almond nails makes them a perennial favorite among nail enthusiasts.
Tailoring Almond Nails to Individual Style: Customization Techniques
Customizing almond nails to reflect personal style involves more than choosing a color or polish; it's about tailoring the shape and length to complement the natural contours of the wearer's hands and fingers. For those with shorter fingers, short almond nails can create an illusion of length without the overt drama of stiletto nails. Conversely, individuals with longer fingers might opt for long almond nails to accentuate their natural elegance. The key is to start filing from the side towards the center point of the nail, maintaining a slight angle to achieve the perfect tapered look without sharp corners.
Moreover, the choice of nail enhancements plays a crucial role in customization. For instance, applying thin lines of gel polish along the free edge can add length and sophistication to the almond shape. Nail artists can also employ techniques like ombré or French tips to further personalize the look. These methods not only beautify the nails but also reinforce the structure, especially when using enhancements like acrylic or hard gel. By fine-tuning these elements, individuals can achieve a tailored appearance that enhances their overall style while ensuring the nails remain functional and fashionable.
The Role of Nail Files in Achieving the Perfect Almond Shape
The right nail file is crucial when shaping acrylic nails into the perfect almond contour. A fine-grit nail file is typically recommended for acrylic nails to smooth out the surface without causing too much abrasion, which can lead to damage. The filing technique involves a gentle, consistent motion focusing on the nail tips, gradually working toward the desired almond shape. It's important to file in one direction to avoid weakening the acrylic structure.
Innovations in Almond Nail Design: Exploring New Aesthetics
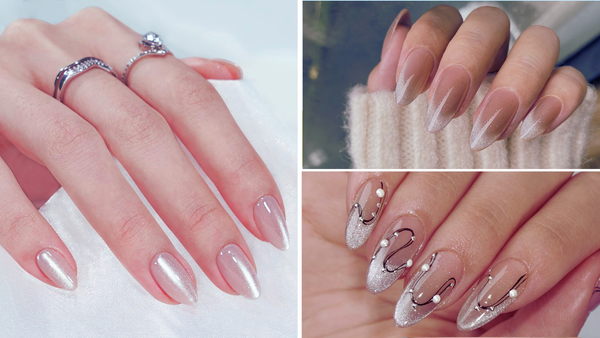
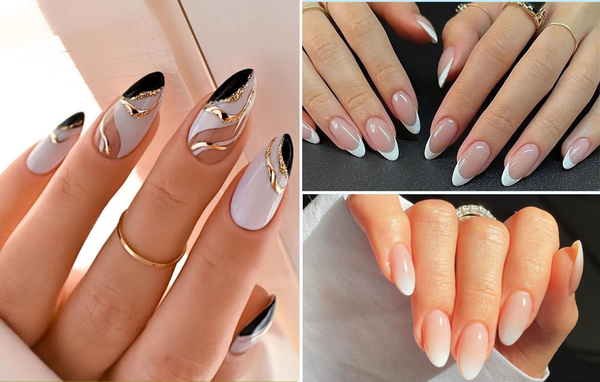
Almond nails provide a fantastic canvas for creative expression, and exploring innovative nail designs can significantly enhance their appeal. Consider incorporating nail art that complements the almond shape, such as thin-line nail designs or subtle patterns that accentuate the elongated silhouette of the nails. Using gel polish or hard gel can add depth and texture to the designs, making them stand out more prominently. Additionally, experimenting with different types of top coats, like matte or glitter, can transform the overall look of the almond nails, giving them a unique and personalized touch.
Another exciting trend in almond nail design is using nail enhancements like acrylics or gel overlays. These enhancements not only add length and strength to the nails but also provide a smoother surface for applying intricate nail art. For those looking to add a dramatic flair to their almond nails, stiletto tips or even slight variations in the traditional almond shape, such as a more curved edge or a sharper point, can create a distinct and eye-catching look. Always ensure that the enhancements are applied professionally and maintained properly to preserve the health of the natural nails underneath.
The Role of Nail Enhancements in Almond-Shaped Nails
Incorporating nail enhancements like hard gel or acrylic can provide strength and length to almond nails, making them more durable and versatile in styling. For those looking to maintain long almond nails, using a hard gel overlay can protect the natural nail underneath while allowing for a more dramatic, elongated almond shape. This method particularly benefits individuals with naturally short or weak nails who desire a more pronounced almond profile. The hard gel adds a layer of protection against breakages and chips, which is essential for maintaining the integrity of the nail shape over time.
Additionally, for special occasions or more elaborate designs, applying nail tips before sculpting the almond shape can add length and provide a uniform canvas for intricate nail art. This technique involves gluing a fake nail tip to the natural nail's free edge and then filing it into the desired almond shape. It's crucial to select the right nail file and filing motion to blend the tip seamlessly with the natural nail, ensuring a smooth transition. Once the desired shape and length are achieved, nail art or polish can be applied as usual, resulting in a stunning and professional finish that enhances the overall beauty of the hands.
Incorporating Nail Enhancements with Almond Shaped Nails
Almond nails provide a fantastic canvas for various nail enhancements and nail art, making them a popular choice for those looking to add a touch of creativity to their manicure. When applying enhancements like gel nails or hard gel, start with a clean, smooth, almond-shaped acrylic base. Use a cuticle pusher and nail polish remover to ensure the nail bed is free of any oils or old polish, which can interfere with the adhesion of the enhancements. Once prepped, apply a thin line of gel polish along the base of the nail, gradually building up the layers to create a robust and durable nail enhancement.
For those interested in nail art, almond shaped nails offer an elegant yet expansive area to work with. Whether adding simple accents like metallic strips or going for more intricate designs like floral patterns or lace details, the almond shape provides a unique blend of sophistication and artistic potential. Use fine brushes and tools to apply your designs after laying down a solid base coat. Once your art is complete, seal it with a top coat to protect your work and add a glossy finish. This not only enhances the beauty of the nail art but also contributes to the longevity of your almond nails.
Creative Expressions: Incorporating Nail Art into Almond-Shaped Nails
Almond-shaped nails are not only a testament to one's grooming standards but also a fantastic canvas for creative expression through nail art. Their slightly pointed tip and wide base make them ideal for intricate designs and embellishments. Whether you prefer a minimalist approach with a thin line of glitter at the cuticle or a bold, artistic display across the entire nail, almond nails provide the perfect shape for creativity. Utilizing tools like a thin brush or a dotting tool can help apply precise and detailed designs.
For those looking to add a personal touch to their almond nails, consider seasonal themes or matching your nail art with your outfit for special occasions. Techniques such as ombre, marbling, or incorporating elements like rhinestones and metallic strips can elevate the overall look of your almond-shaped nails. Remember, while the aesthetic aspect is crucial, ensuring the underlying health of your natural nails and cuticles is equally important. Regular use of cuticle oil and keeping the nails hydrated will ensure your nail art doesn't just look good but is also supported by healthy, strong nails.
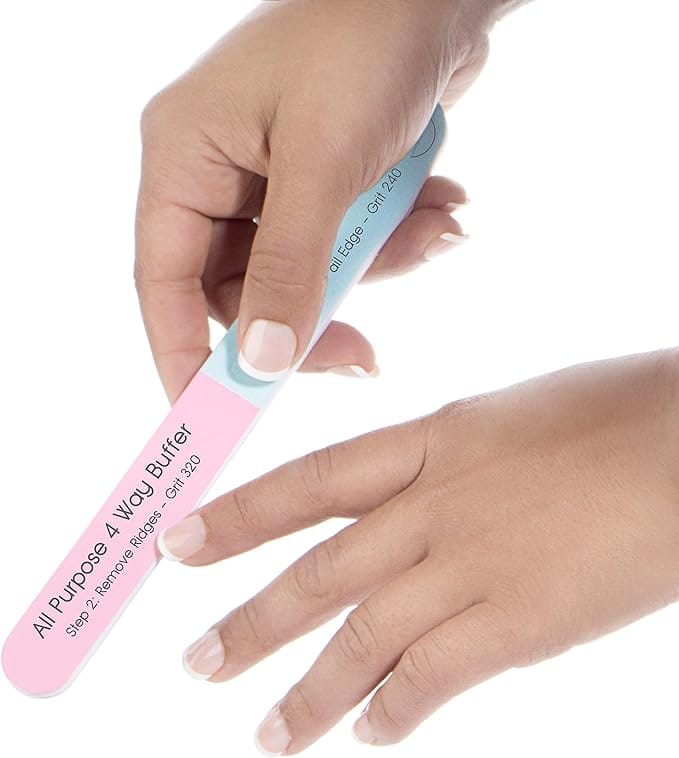
Smoothing and Perfecting
After achieving the desired almond shape, go over each nail with a fine-grit nail file to smooth out any imperfections and ensure that each nail mirrors the others perfectly. This step is crucial for achieving professional-looking results.
Applying Polish and Finishing Touches
Choose a nail polish or gel polish that complements your style. Apply a base coat to protect the nail, followed by your chosen color. Sealing everything with a top coat for added shine and durability. Allow ample time for each coat to dry to prevent smudging.
Regular Maintenance Tips

To keep your almond shaped nails looking their best, regular maintenance is necessary. Apply cuticle oil daily to nourish the nail bed and keep the skin around your nails healthy. Additionally, file any chips or rough edges as soon as they appear to maintain the shape.
Summary
Filing acrylic nails into an almond shape can transform your hands into a statement of elegance and style. By following the correct preparation, shaping, and maintenance techniques, you can achieve and preserve beautiful almond nails. Remember to use the right tools and take time with each step to ensure the best results.
FAQ
What is the best nail file grit for acrylic nails?
For acrylic nails, it's best to use a fine-grit nail file, typically 180 to 240 grit. This grit size helps shape the nails without damaging the acrylic material.
How often should I file my acrylic nails?
You should file your acrylic nails every 2-3 weeks to maintain their shape and length. Regular filing helps prevent the nails from getting too long, which can lead to breakage.
Can I use the same technique to file acrylic nails into an almond shape for oval nails?
Yes, the technique for filing almond-shaped nails also works for oval nails.
Is it possible to file acrylic nails into an almond shape if they were originally shaped as coffin nails?
Yes, it's possible to reshape coffin nails into an almond shape using the proper filing technique.
Can I use curved-edge nail clippers to help shape acrylic nails into an almond shape?
No, curved-edge nail clippers are not suitable for this purpose. You should use a fine-grit nail file.
Can I use the same filing technique to achieve an almond shape if my acrylic nails are stiletto-shaped?
Yes, you can use the same filing technique to transition from stiletto to almond shape.
Can I file fake nails into an almond shape?
Yes, you can file fake nails, including acrylic nails, into an almond shape using the appropriate technique.
Can I file my natural nails into an almond shape?
Yes, you can file your natural nails into an almond shape, but the article specifically focuses on filing acrylic nails.
Can I use any nail file to shape acrylic nails into an almond shape?
Yes, you can use a nail file with fine grit to effectively shape acrylic nails into an almond shape.